The following is a step by step guide for installing the ToppClip™ System to secure shipping pallets or other containers.
Step 1: Prepare the Pallet
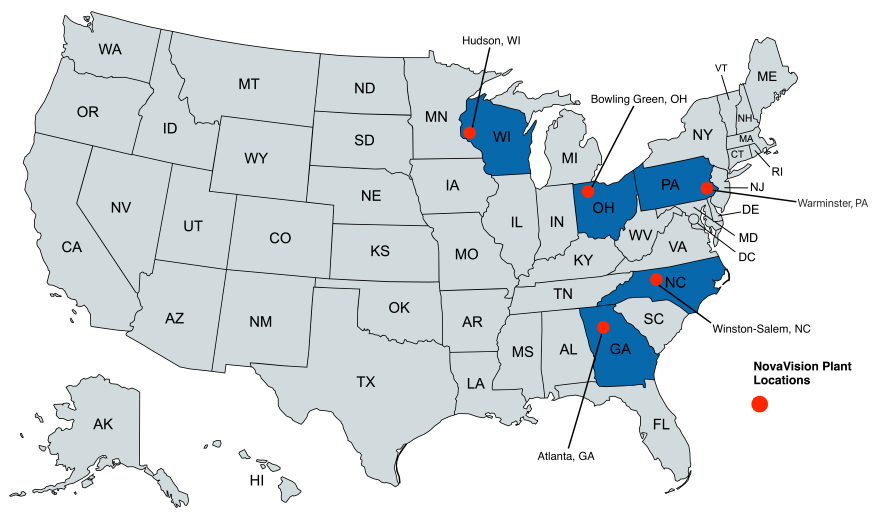
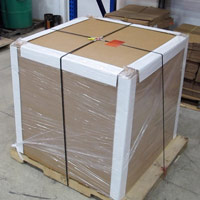
Prepare the pallet (or crate) prior to applying the ToppClip™ System.
- As needed to prevent pilfering of one carton, use cardboard panels, or wood panels on the sides, bottom and top. Other options include shrink wrap, stretch wrap, and/or a plastic bag.
- As needed to prevent shifting loads during shipping, secure the pallet with stretch wrap, strapping, edge protectors, and/or strap protectors.
- The pallet is now ready to apply the ToppClip™ system.
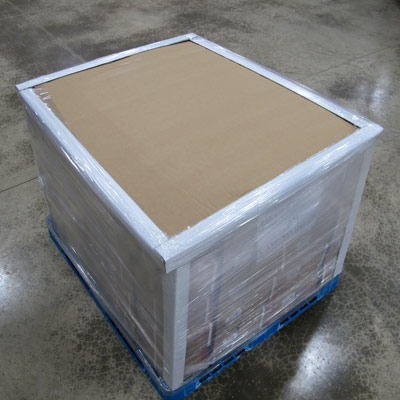
Step 2: Position and Tension the Strapping
Thread the strapping under and around the pallet. The strapping should be continuous with no crimps other than those of the metal ToppClip™. Any other crimping devices would be a sign of tampering.
After threading and positioning the strapping, tension the strapping on one side the clip.
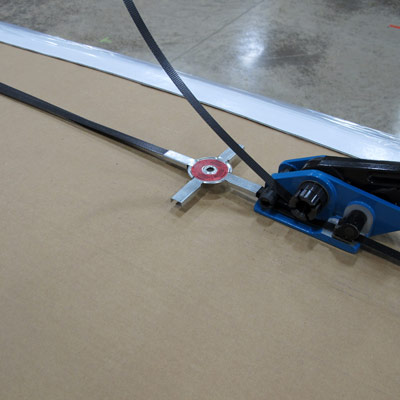
Step 3: Crimp Metal Clip
Crimp the metal clip to secure the strapping.
Step 4: Crimp Clip On Opposite Side
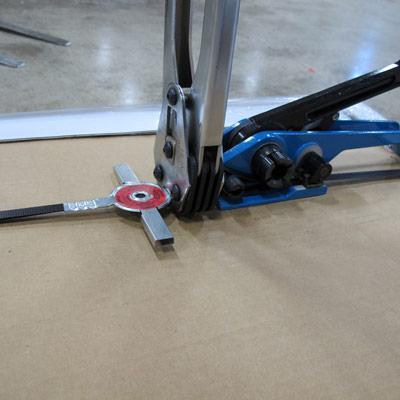
Crimp the clip on the opposite side to fully secure the first strap
Step 5: Tension Cross Strapping
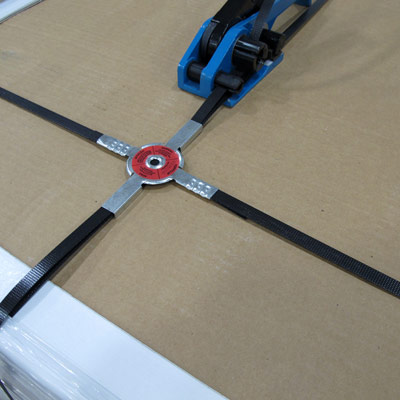
Thread the next strap under and around the pallet. The strapping should be continuous with no crimps other than those of the metal ToppClip™. Any other crimping devices would be a sign of tampering.
After threading and positioning the cross strapping, tension the strapping on one side the clip.
Step 6: Crimp Metal Clip
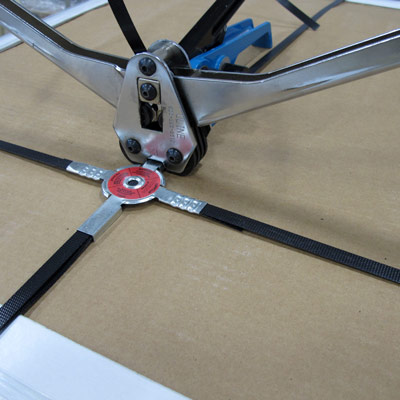
Crimp the metal clip to secure the crossed strapping.
Step 7: Crimp Clip on Opposite Side
Crimp the clip on the opposite side. The strapping is now fully secured to the ToppClip™.
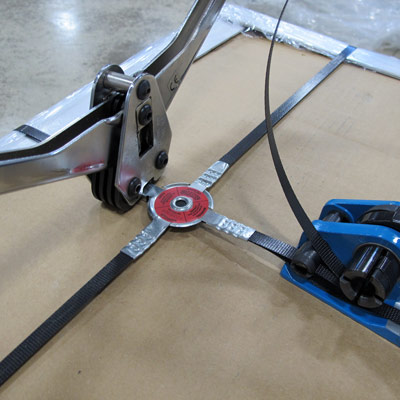
Step 8: Punch Hole in Strapping

Position the hole punch (Model TCP-HD1) over the hole in the metal ToppClip™.
Punch a 1/8 inch diameter hole in the strapping through the ToppClip™ hole (shown using the heavy duty punch TCP-HD1).
If metal strapping is used, use a punching tool which is compatible with punching four layers of metal straps. We recommend our heavy duty hole punch (TCP-HD1).
Step 9A: Affix Plastic Seal
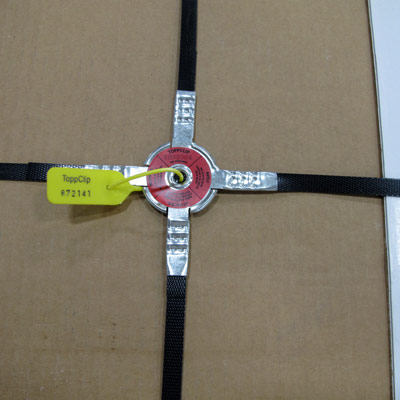
Affix Plastic seal. Thread through the hole in the ToppClip™. Thread into the plastic seal and cinch tight.
This seal prevents the strapping from being replaced at the ToppClip™ connection points.
Step 9B: Affix Wire Seal
Note: Wire Seals are provided on some ToppClip™ kits for some customized seals.
Thread the wire through the hole in the ToppClip™. Insert the wire through the hold in seal housing. Rotate the tab to cinch tight. Break off the tab to minimize tampering.
This seal prevents the strapping from being replaced at the ToppClip™ connection points.
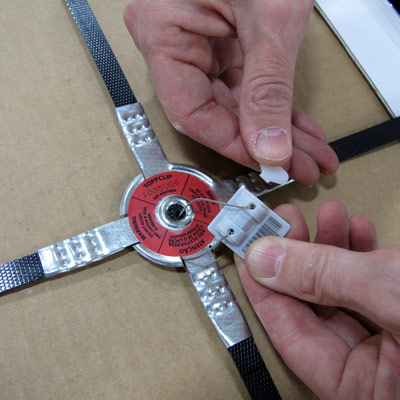
Step 10: Affix Tamper Evident Label
Remove the tamper evident label from the paper backing. Remove slowly to prevent prematurely triggering the tamper evident feature. The tamper evident feature is very sensitive; minimize touching the adhesive with your fingers.
Affix the tamper evident label across one of the straps.
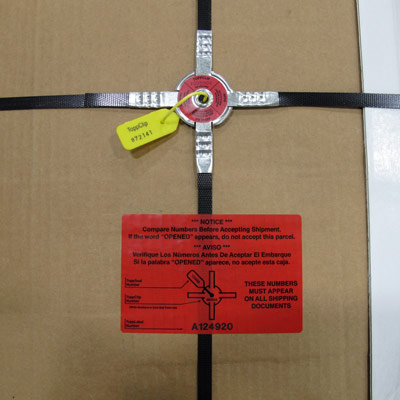
Step 11: Record Serial Numbers on Label
Record the serial numbers for the metal clip and plastic seal on the tamper evident label.
Also record the serial numbers on the bill of lading and packing list for the shipment.
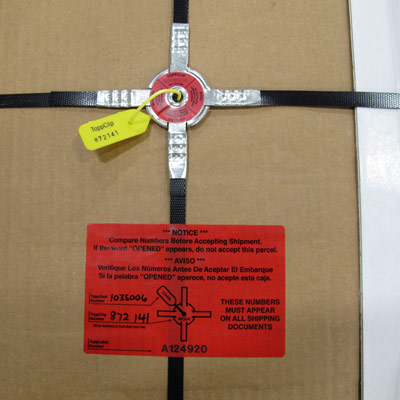
ToppClip™ System Fully Installed
Installation complete!